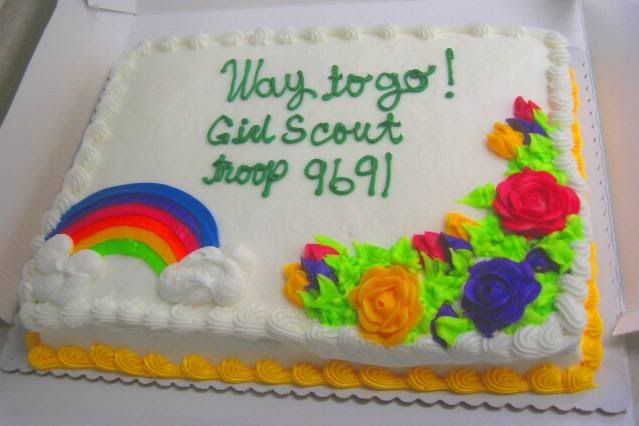
Wednesday, October 21, 2009

"Jack-O' Lantern"

Thank you parents for your contributions of $3.00 to help defray the cost of this week's craft project. Also a thank you to Novia, Irma, Holly, Lisa, and Stephanie for helping set up and supervise the painting.

A SPECIAL THANK YOU to mom's Nancy and Lisa for donating the snack and drinks for this meeting!
The girls enjoyed them.


This week's troop meeting~ PART ONE... Have you ever thought about a tradition you do and have no idea how it all came about, you just do it year after year, because, after all, it's what you do. Carving pumpkins on Halloween is one of those traditions. In this weeks troop meeting, we talked (in general terms) about the myth behind the popular "Jack-O' Lantern" and the tradition of carving pumpkins. (For the detailed myth CLICK HERE)


The general myth of the "Jack-O' Lantern" shared at our troop meeting:
The legend of Jack O' Lantern goes back to hundreds of years in the Irish history. The original Jack O' Lantern was not a pumpkin, but a miserable, old drunkard man nicknamed Stingy Jack who played tricks on people and lied to anyone he came in contact with, including family, friends, his mother and even the Devil himself. Myth has it that when Stingy Jack died, he wasn't allowed to enter heaven or the other place, so he roamed around on the earth without any place to rest. He roamed around as a ghost with his lit lantern... this is when he was then called Jack of the Lantern (shortened to Jack-O' Lantern). The Irish people kept the fable of Stingy Jack alive by hollowing out turnips, rutabagas, gourds, potatoes and beets on All Hallow's Eve (Halloween) and making their own version of a Jack-O' Lantern with scary faces on them. They set a candle in their Jack-O' Lanterns and placed them on their front porch to ward off the evil spirits and keep the ghost of Stingy Jack away. These were the original Jack-O' Lanterns. Irish immigrants brought the Jack-O' Lantern carving tradition with them when they came to the United States, and soon switched over to pumpkin-carving when they discovered that pumpkins were growing in abundance and much easier to carve than turnips etc.

Instead of carving pumpkins at our troop meeting (for safety purposes), we decorated them with washable poster paint to look like Jack-O' Lanterns. The girls had a good time showing their creativity in giving their pumpkins color and personality.


Below are some pumpkin carving ideas
for crafting your own pumkins at home...

IT WOULD BE A GREAT FAMILY FUN NIGHT!

Click Here for stencils
Click Here for stencils and other "how to" ideas
Click Here for carving tips

Awards

This week's troop meeting~ PART TWO...

The girls received their
patches and badges
they've earned so far
in an informal ceremony~

GREAT JOB GIRLS...
YOU ROCK!


AWARDS GIVEN~

  • 2009 Cookie Prizes and Cookie Patches for Brownies and Juniors who participated in Cookie sales last year (Jan-Feb).
    These patches need to be ironed on the backs of the vest or sash. Start toward bottom and work up.

  • 1st Year Daisy Girls received their center patch.
    These patches need to be ironed on the front left side of the vest. (See Illustration)

  • All Girl Scouts who participated in
    "
    Music" meeting received a Music Patch.
    DAISY- iron on back of vest starting from bottom
    BROWNIE- This is a "Try-It" and is ironed on the front bottom of your vest- either side you choose (
    See Illustration)
    JUNIOR- this is an earned Junior Badge for participation and is ironed on the front. (See Illustration)
  • All Girl Scouts who participated in this week's
    "Jack O' Lantern" activity received
    a Jack O' Lantern fun pin.

    All levels- place on back of vest or sash where most comfortable.

For more information about how
to iron on these patches, please CLICK HERE.

"How To" Iron On Your Girl Scout Patch

As the girls earn their patches through participation and/or service projects, displaying them on their uniform is part of the fun in the Girl Scout experience. As the girls receive their patches of achievement, we want to encourage you to promptly get them adhered to the vest so the girls can display their accomplishments (also so the patches don't get misplaced or lost).

Some of the patches the girls receive are packaged with directions on how to iron them on the garment, but many patches are given loose, without directions. This post is to help you know how and where to put the Girl Scout patches on the uniform as the girls receive them. If your patch does not have an "iron on" medium on the back (many patches do not), you can buy fusable paper or Patch Glue at your local fabric or craft store- this will enable you to iron your patch on (OR you can always sew it!)


HOW TO PLACE YOUR PATCHES

What You'll Need:

  • Iron-On Patches
  • Iron & Ironing Board
  • A press cloth (light color hand towel, wash cloth, or cotton pillow case)
  • Girl Scout Vest or Sash
  1. Preheat iron on the cotton or high heat temperature setting for 5 minutes.

  2. Lay your garment flat on iron board.

  3. Remove release paper if there is any (wax type paper on back of some patches), set patch aside.

  4. Iron area of garment where patch will be placed for approximately 25 seconds.

  5. Place your patch in desired location on the garment.

  6. Gently lay press cloth over patch. (The towel is there to protect your patch and your garment from the iron. Sometimes, irons can have a dirty residue on them. Also, some patches or fabrics can be sensitive to heat and will melt if touched directly by the iron.)

  7. Place heated iron on the towel over the patch and press down firmly with your iron for 10-15 seconds. DO NOT apply hot iron directly to embroidered area.

  8. Turn garment inside out. Carefully iron the back side of the patch in a back and forth motion for 35-45 seconds while pressing firmly.

  9. Once your patch is pressed, let it cool completely, then try picking gently at the edges. It should not peel up, but if it does, then you need to iron it just a bit more with your press cloth (especially on the edges).


WHERE TO PLACE YOUR PATCHES

Daisy (click here)
Brownie (click here)
Junior (click here)

"Fun Patches" and "Fun Pins" are always placed on the back of the girls' uniform.

Laundering the Girl Scout Vest

If your Girl Scout gets her vest or sash dirty, it can be laundered.
  1. Take off all PINNED ON items.

  2. Machine wash warm, cool rinse or on delicate cycle.

  3. DO NOT use bleach.

  4. Tumble dry low or line dry.

  5. DO NOT DRYCLEAN

Wednesday, October 7, 2009

MUSIC Anyone?

Our meeting was focused around MUSIC and each Girl Scout at this week's meeting earned a "Music Patch" for their particular GS level ~ Daisy (Fun Patch), Brownie, Junior (click level to see patch earned. Patches will be awarded at a future meeting).

We discussed:
  • What is Music?
  • How many of you regularly listen to music?
  • Do any of you play a musical instrument or enjoy singing?
  • Where do you usually listen to your music?
  • Why do people listen to music?
  • and What kind of music do you all listen to the most?

The girls were all very sharp with answering these many questions! Many of the Girl Scouts in our troop are involved in playing a variety of instruments from piano, to flute, to guitar, and even violin! Everyone in our troop likes to sing!

We learned a new word and definition: GENRE Can everyone say GENRE (zhan-ra)? ...the voices of young girls all say their new word together several times.

As the girls all sat in a semi-circle on the floor, facing a boom box with 13 different styles of music, they were challenged to identify the genre of music as each tune played.

...country?
...classical?
...soft rock?
...jazz?
...big band/swing?
...reggae?
...gospel/Christian?
...traditional Christmas?
...pop?
...folk?
...rap?
...blues?
...hip hop?
...heavy metal?
...rock?
...soft rock?

CHALLENGE: Listen to the variety of music on the play list below and see if you can identify each different genre. (not all are represented, several are duplicated)


DID YOU KNOW? it has been proven that when words are put to music people are able to remember the words easier than if the words were just spoken regular tone? TRY THIS~ When you have school work to study or memorize and are having a challenge remembering it, try making a song putting the words you're learning to a familiar tune (like twinkle twinkle little star or any song that you like) This exercise should help you remember what you're trying to learn! (Like Hannah Montana did with the song and dance in the episode where she had to learn the bone names of the human body)

To have fun incorporating different musical instruments, we played "Musical Instrument Charades"! The girls were creative with acting out playing piano, flute, guitar, trumpet, harmonica, the list goes on...
We ended our troop meeting breaking into our different Girl Scout levels (Daisy, Brownie, Junior) and each completed a "Friendship Circle" ~The friendship circle is often formed at the end of meetings or campfires as a sort of closing ceremony. Everyone gathers in a circle where they cross their right arm over their left in front of them and hold hands with the people on either side. Once everyone is silent, the leader starts the friendship squeeze which is passed from hand to hand. Often the girls will make a wish after their hand has been squeezed before they pass the squeeze along. Also, in some larger groups, the girls put their right foot out into the circle when they receive the friendship squeeze, so that everyone can see it travel along the circle.

GIRL SCOUTS ROCK!

DAISY NEWS!

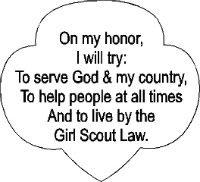
During our troop meeting, the first year Daisy girls earned their center patch by individually making their best effort to recite the "Girl Scout Promise". Patches will be given in a small ceremony at the end of our next meeting.

Great job girls!!!